Dancing James Baxter
Some people just make you sick! And i mean that in the most complimentary way possible :) In case you never saw it while it was on his website, i found it here on youtube. It's a fun bit James made for the "open house" party at his studio. Some people got flipbooks, I haven't been able to get my grubby little hands on one yet, and notice the "yet"... So, enjoy this whilst I try going back to bed and actually sleeping for a change. cheers!
Wednesday, October 25, 2006


Monday, October 23, 2006
HAPPY BIRTHDAY NOMAD!

How nerdy is this, I'm celebrating my blogs birthday! Well, what's NOT lame is all you people out there who've made this so much fun to do! The funny thing about this blog is that i started it so flipantly that i never expected or intended to do much with it. I though it'd be a convient way to show potential employers some work i've done. Well, nearly 50,000 hits later it has been a big teaching venue, as well as showing off a little bit of what i've done.
The most enjoyable part has truly been hearing from people like yourself that visit every now and again! I love sharing animation and what i've learned about it, and it's been a blast to hear that some many people enjoy reading about it too! Also, the other great thing about this new blogland we have found ourselves in is all the AMAZING artwork out there! It's scary, but inspiring too! If there's any 2D guys out there with blogs, post more pencil tests man! There are only a couple i know of that do, i think it'd be really fun to see more of that out there!
This next year i'd like to finish that tutorial of course, ya know, on how to approach a scene. I still have to finish all the tie stuff. by the way, that bear shot is nearly complete, about 85 percent done man! but i want to post more on my short film-- maybe some designs, even though i suck at it, maybe some boards, and definately more animation.
So thanks to all the amazing artists out there who have made this such a fun experience and here's to another year at the Hand Drawn Nomad!
Tuesday, October 17, 2006
From 2's to 1's
I've been thinking about this for a while, and it kinda works out that I can post this now cuz I've been teaching this in my class at CalArts. There is a real danger in SOLELY thinking on 2's. Meaning, you assume that if you need to add ones inbetween those drawings all you do is simply add them in evenly spaced. Not so much-- It's a super important tool to understand the difference in spacing on ones and two's and it can be kind tricky. but the important thing here is to understand WHY you space things a certain way, not memorize charts for whenever the occasition pops up.
I thought a very clear way to present this idea would be through a little ball bounce experiment for ya'll to prove my points. I've animated 4 different ball bounces, all different spacing. 1: all 2's, 2: lazy inbetweens, 3: adjusted spacing, 4: fine tuning of spacing. The first test is completely on two's--
Ball Bounce on 2's - video powered by Metacafe
I thought a very clear way to present this idea would be through a little ball bounce experiment for ya'll to prove my points. I've animated 4 different ball bounces, all different spacing. 1: all 2's, 2: lazy inbetweens, 3: adjusted spacing, 4: fine tuning of spacing. The first test is completely on two's--
Ball Bounce on 2's - video powered by Metacafe


As you can see it works "OK", but it's not great-- what would give it a lot more fluidity and weight, you decide, would be to put it on to 1's. And I would agree with you, plus it's strobing! So, you just think, whelp, just throw in there 1 drawing between every other drawing and we just be set! Yeah, ummmm, THEN your results come back and you get this:
Ball Bounce - video powered by Metacafe


It's not terrible, but it doesn't have the weight you'd hoped for-- in fact, it feels kinda watery and floaty. Why? What happened-- this animator made "lazy or possibly ignorant inbetweens"... Meaning, he wasn't considering the transition of spacing from ones to 2's or he wasn't thinking period. The main parts of the test, you'll notice, is in the slow in's and out's and the contact of the ball. By the way, side note: you always need at least 2 frames of contact for it to actually read as a contact. Anyway, you think, huh, how can I fix this-- you need to respace some of your animation. You locate the problem areas and begin rethinking it. It seems floaty from 17 to 1, so you respace with place 18 as a half, 19 as a half, and 20 as a third (because that last inbetween needs to be a third to continue the slow out).
ball bounce - video powered by Metacafe

Ok, so it's looking pretty close now! That repsacing from 17-1 really helped! But man, it's still a tiny bit sticky on the contact, and it still doesn't have the punch on the impact that you wanted. What else is there to do? You've already respaced it to an extreme favor-- Whelp, just take out the drawing 10 and add one frame into your slow in at the beginning of the chart! Simple as that!
Ball Bounce - video powered by Metacafe
So yeah man, 1's can be tricky, and sometimes it's a trial and error thing to figure out what'll translate but I think the important thing here to remember is to PLAN FOR ONE'S. If you know your going to need to be doing something that requires 1's, plan for it, build it into your existing work that is on 2's. This is why I animate with the lightbox on, so I can see where my spacing is coming and going from. Spacing is one of those very important pieces of the animators tool-kit that so few truly understand. I'd like to do a whole other post on spacing when your animating your Keys on 3's: 1, 4, 7. but i'm affraid i don't have the energy at the moment! Thanks for continuing to visit everyone! I love hearing from you all, and please, feel free to ask any questions you want!
Wednesday, October 04, 2006
Were have I been man!
My apologies everyone! Man, has been so psycho... have been helping someone to get ready for pitch and had to animate, like, near 30 feet in 3 weeks! Ughhhh, i hate it when life gets taken over by work--
So, because of my business i am going to continue the tutorials but in short bursts. I just don't have the time to sit down and organize an entire huge entry right now, but i need to keep posting. I dug this up... i showed this in a rougher version a long time ago but i realized i never posted the finished piece! I like the weight in it, but i spent so much time on the beginning that the end, the real acting got sacrificed. meaning, i had to cut it off about half way through cuz of time. So, hope everyone enjoys!
hand drawn animation on Vimeo
So, here's a little question I'd be curious to hear from all you traditional animators on. What would you prefer to work on... cintiq, paperless hand drawn animation or just the regular paper and real pencil animation? I ask cuz I've heard very mixed reactions-- I've tried the cintiq, i hate it personally although I'd do it if i had to. but i would prefer a choice between which method. what do you guys think?
So, because of my business i am going to continue the tutorials but in short bursts. I just don't have the time to sit down and organize an entire huge entry right now, but i need to keep posting. I dug this up... i showed this in a rougher version a long time ago but i realized i never posted the finished piece! I like the weight in it, but i spent so much time on the beginning that the end, the real acting got sacrificed. meaning, i had to cut it off about half way through cuz of time. So, hope everyone enjoys!
hand drawn animation on Vimeo
So, here's a little question I'd be curious to hear from all you traditional animators on. What would you prefer to work on... cintiq, paperless hand drawn animation or just the regular paper and real pencil animation? I ask cuz I've heard very mixed reactions-- I've tried the cintiq, i hate it personally although I'd do it if i had to. but i would prefer a choice between which method. what do you guys think?
Thursday, September 14, 2006
An oldy but a goody
hand drawn animation on Vimeo
It's hard to believe that this piece of animation is nearly 4 years old now-- thank goodness for growth. Some of those drawings a terrible in there! The fun thing about this shot is it was the first real shot that i had on the film that was of any significance. It ain't perfect, i hate the last 30 frames of it or so, i got very pressured by production towards the end of this shot ( was pretty slow back then). I don't think straight under pressure... it coulda been so much better, but ah well-
Things have been so crazy- working day, night and weekends. I have no time to post anymore... sucks i know-- but i see free time coming my way, and when it does be sure you see a continuation on the "tie down" part of these tutorials!
Until then, cheers!
Matty
Thursday, September 07, 2006
another plug: Andrew Shek

Whilst i grind away on free-lance and preparing future tutorials take a look at this blokes blog! Andrew Shek www.elephantart.blogspot.com . Sometimes there are people that just understand something, in this case, it's design. I've always kinda had bland, sucky designs so when i see someones work like Andrew it always makes me wanna work harder at getting better with design. Take a look!
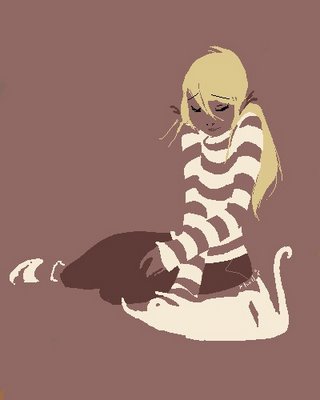
And heck while your at it take a look at this girls blog too! Robin Hall at http://idlesiren.blogspot.com/. She too very obviously has a gift for design and puts me to shame man!
Saturday, September 02, 2006
Tie Down: Refining your acting, drawings, and the technical side
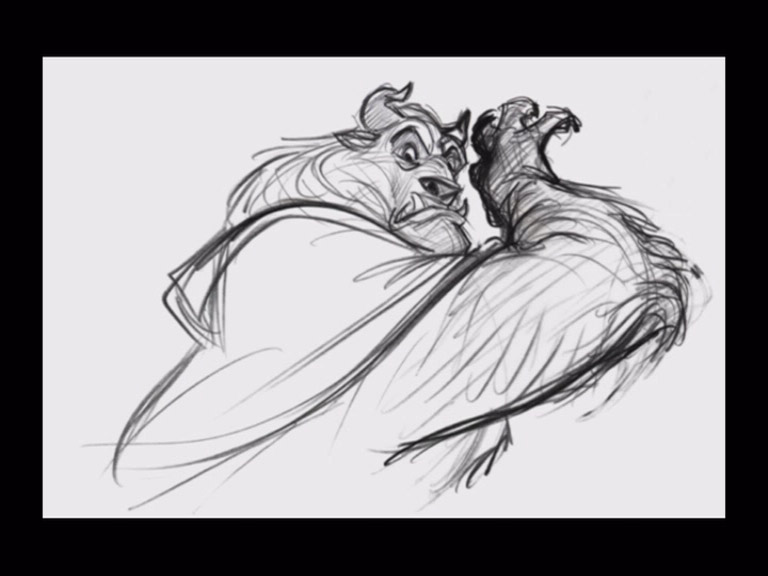
Phewwwwwwww! Have been SOOOO busy between preparing to teach 2nd year at CalArts, (for which i am VERY excited about!), working on a project that could spawn into something cool if it actually takes off, and a bunch of other life stuff! So, i thought about posting something completely non related to animation but declined after i thought about what people expect from the blog.
So, where to start. Tie down is just like roughing out a shot, it's up to your disgression about how you want to tie down a shot. I think you have to examine who you are before you decide on a method- and it's totally cool to switch methods up. I do to a degree. but i thought for starters i'd show a bunch of different examples of tied down drawings and talk about them a bit.
First up is Glen Keane. Glen is a good place i think to start when talking about tie down-- He's very individual, which is something i admire greatly. He's draws loosely, but everythings there. Actually i think his rep for drawing really rough is a bit over-stated. Some of his drawings are actually rather direct, that thick line can make them look rougher than they really are. But the main point to draw (no pun intended) from someone like Glen is the best type of tie down for you to do is one that you do naturally. This is the way glen draws... so let him draw that way! I've spent waaaaaaay too much time in my artistic life trying to draw like someone else. Be you! That's what makes these guys stand out, is that they are being themselves to the ultimate capacity. what if everyone drew like Milt, that would be soooooo boring! If you follow that path you'll only ever be a medocre copy of another mans genious. Something else i find in
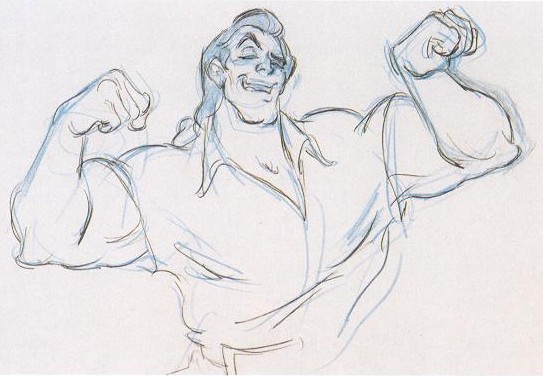 teresting is that sometimes we do things that mean something to us that others view as "pointless" because no one will ever see it. Glen shades his drawing, no one will ever see that stuff but if that is what he needs to do to make a drawing come alive then he HAS to do it! Obviously the downfall of tying a drawing down this way is that it can be difficult to follow by an assistant. but, if your assistant actually knows how to draw you should be alright.
Next up is Andreas Deja. Everyone knows he's a Milt fanatic, just like most of us although i think he's taken fandom to a new level with his HUGE collection of animation art. I think Andreas is another great example of being yourself but still having an influence. It's really quite obvious that Andreas loves Milt, but it doesn't look exactly like a Milt drawing. There's a flare to his drawings that are completely his own, and that's what makes them so beautiful! Andreas is also no where near as anal as Milt was in terms of tying down a drawing. You will see what is important to an animator by the way he ties down his drawings-- I think Andreas is a bit more technical minded that Glen is but they are both overwhelmingly emotional. Which is not a bad place to be!
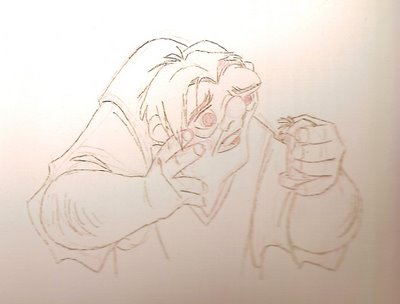
Ahh- one last example here of a tie down drawing although there are infinite examples in my opinion. James' drawings are just like his animation, delicate, precise, and clear. You'll note his line quality-- it's a sort of etchy kind of line. The first person i can think of that really used this was Ronald Serle, and Milt loved Searle and used it a little bit, Fucile loved both those guys and implimented it into his drawings and James and Tony (from what i've heard) are good friends and have had an influence i'm sure on each other. Now personally, I prefer this method of tying down. I feel this-- whatever gets up on screen should be 100 percent your doing, whether it's good or bad. This way of working is a bit on the practical side in terms that your animation moves through clean-up WAY faster than a rough scene does (assuming it's on model and everything). But even more than that it offers a reallyu great amount of control to the animator. Sometimes when your lines get mushy and thick it can be tough to do subtler stuff with the eyes because your pencil is too thick and the spacing get's lost. Once i switched to this method my acting got called out on the carpet. I couldn't hide behind loose drawings anymore-- this is not to claim that Andreas and Glen hide, it's actually quite the opposite. what i mean is more the irresponsible type of draftsmenship where you leave WAY too much to clean-up. That's not Glen or Andreas-- what i am getting at is that it's important to me to be in control of what i do. This is the perfect method FOR ME. Maybe not for you--
I guess the key to this particular post is to experiment and be you to your fullest capacity! I feel very strongly that when you are comfortable in being you then your art will really take on a life of it's own. Yes, influences are important to the development of an artist, mine are probably pretty obvious, but staying there is artistically stunting. Be curious, branch out, take risks--
The next post will start to cover the refining process of tie down in hand drawn animation- putting things on model, turning the character, refining spacing, and most importantly refining your performance: adding eye darts, taking eye darts out, meaningful blinks, ect... thanks for your patience everyone. Life doesn't seem to want to stop for my blog!
Thursday, August 24, 2006
TEASER
bear animation on Vimeo
Have been pretty busy between working freelance and trying to get this shot tied down-- i knew it'd be a while until i would get it complete which is the way i wanted to present it, but i thought i owed it to everyone to show where it's at as of right now.
As far as critique, the one change i am going to make is a little bit of lip sync stuff arounf the "get outta here". Fast dialgoue can be tricky- and where i put the blink on the word "simple", i feel takes away from his expression and the sorta of "eureka" feeling i wanted, like, he's think "well isn't it obvious". I feel like taking the blink out, and closing the eyes before the accent on the I of "simple" and the overshooting them will give me a more truthful performance. so anyway, check it out and stay tuned!
Thursday, August 10, 2006
IT'S COMING!
IT'S COMING!!!!!
 Hey everybody! The tie down is coming i promise-- this ones gonna take some time though! I'll do my best to post what and when i can but haven't had much to say yet. but believe me i will once i can show ya'll this tie down version! hang in there everybody and we'll see ya on the next post!
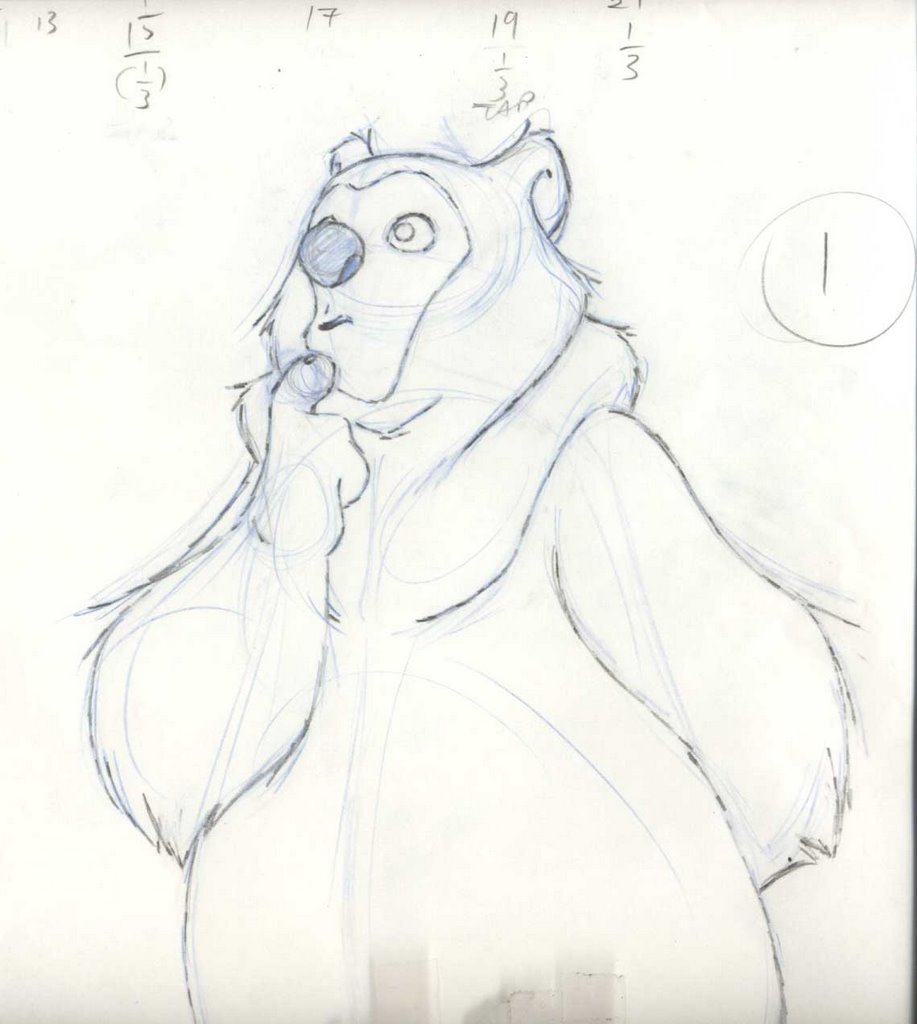 Hey everybody! The tie down is coming i promise-- this ones gonna take some time though! I'll do my best to post what and when i can but haven't had much to say yet. but believe me i will once i can show ya'll this tie down version! hang in there everybody and we'll see ya on the next post!
Tuesday, August 01, 2006
Random nuggets of joy
I've had a lot of time to sit around and think about what i might not have covered in the last few posts on animating a shot, so i've come to a boiling point now and i think i'm ready to spew out some thoughts.
Here's a debateable topic: Animate with lightbox on or off? As with MANY things in the process of animating this is what i've learned, EVERYONE DOES IT DIFFERENTLY! James Baxter animates with it on, others like John Pomeroy animate with it off. not all the time i'm sure, but that's at least what i've witnessed these 2 do. and yet, they are both great. answer... it's up to you- it's good to know the pro's and cons for having it on all the time.
PRO'S:
easy to track spacing
helps with keeping volumes
helps keep a good context in your mind of where you are
CONS:
Sometimes your drawings can get kinda flat
you stop flipping
things start to become mechanical
Me, i animate with it on most of the time, but, i always have my lamp angled "just so",so i can focus on the drawing i have on the pegs a little better. Like i said, it's seems to me that everyone does it differently.
Spacing: Here's an interesting subject that i'll cover more once i delve into tie down more, but spacing is something i've discovered few animators understand even though it's the difference between weight and no weight, laugh or no laugh in a scene. It's very technical but once you understand it you can start using it artistically. The bottom line for me and spacing is mostly about "where to put what", meaning, where do i use half's and where do i use thirds. It'snot easily explained, but i'll say this. Anytime you are slowing in and slowing out i typically use a 3rd on the very last inbetween to the key drawings. however if a character is slowing down but not to a complete stop and then progresses to speed up i will just use halfs. confused-- don't worry about it, i'll explain more later.
Ahhhh, here's a frustrating one! KEEP IT SIMPLE STUPID! Everyone in animation knows this K.I.S.S. things. I think this is the critique i've heard more from animators i respect than any other critique. As animators we kinda wanna impress, ya know? show all our amazing "skills" to qoute Napoleon... but it's really a matter or being confident enough NOT to do something fancy to linger on a pose. I have found that this for me is atough line to draw sometimes. You can go too far in any direction really.... "if i hold it back too much, it'll have no nuance. If i don't simplify enough my poses won't read." Unfortunately there is no answer-- it's case dependsant, but the answer for each scene revolves around what the point of the shot is. and believe me you guys, i'm preaching to myself! If the scene benefits from those eye darts your throwing in there, then great, but if it's distracting then take'em out no matter how well executed they are. Something i heard alot from Tony Derosa was "work within the pose". I used to get confused cuz his stuff would seem so boiled down to me-- and THAT'S the point! He boils things down to their essence and works within the poses. working within the pose can be anything the character does while in the pose (head shakes, blinks, slight breathing). Look at the stuff on Sher Kahn, Milt could drawing anything and move stuff like no one else, yet, that's the most subtle stuff he ever did! What used to impress me was stuff that moved brilliantly (good weight and such), but now what blows me away is subtle acting that makes you feel something. It's kind of scary really-
Okay, just had to get that off of my chest! I am hoping that the next post can be a continuation of the "tutorial series!". I just finished 2 jobs and actually have time to work on my own stuff. yeah!! take it easy all!
Here's a debateable topic: Animate with lightbox on or off? As with MANY things in the process of animating this is what i've learned, EVERYONE DOES IT DIFFERENTLY! James Baxter animates with it on, others like John Pomeroy animate with it off. not all the time i'm sure, but that's at least what i've witnessed these 2 do. and yet, they are both great. answer... it's up to you- it's good to know the pro's and cons for having it on all the time.
PRO'S:
easy to track spacing
helps with keeping volumes
helps keep a good context in your mind of where you are
CONS:
Sometimes your drawings can get kinda flat
you stop flipping
things start to become mechanical
Me, i animate with it on most of the time, but, i always have my lamp angled "just so",so i can focus on the drawing i have on the pegs a little better. Like i said, it's seems to me that everyone does it differently.
Spacing: Here's an interesting subject that i'll cover more once i delve into tie down more, but spacing is something i've discovered few animators understand even though it's the difference between weight and no weight, laugh or no laugh in a scene. It's very technical but once you understand it you can start using it artistically. The bottom line for me and spacing is mostly about "where to put what", meaning, where do i use half's and where do i use thirds. It'snot easily explained, but i'll say this. Anytime you are slowing in and slowing out i typically use a 3rd on the very last inbetween to the key drawings. however if a character is slowing down but not to a complete stop and then progresses to speed up i will just use halfs. confused-- don't worry about it, i'll explain more later.
Ahhhh, here's a frustrating one! KEEP IT SIMPLE STUPID! Everyone in animation knows this K.I.S.S. things. I think this is the critique i've heard more from animators i respect than any other critique. As animators we kinda wanna impress, ya know? show all our amazing "skills" to qoute Napoleon... but it's really a matter or being confident enough NOT to do something fancy to linger on a pose. I have found that this for me is atough line to draw sometimes. You can go too far in any direction really.... "if i hold it back too much, it'll have no nuance. If i don't simplify enough my poses won't read." Unfortunately there is no answer-- it's case dependsant, but the answer for each scene revolves around what the point of the shot is. and believe me you guys, i'm preaching to myself! If the scene benefits from those eye darts your throwing in there, then great, but if it's distracting then take'em out no matter how well executed they are. Something i heard alot from Tony Derosa was "work within the pose". I used to get confused cuz his stuff would seem so boiled down to me-- and THAT'S the point! He boils things down to their essence and works within the poses. working within the pose can be anything the character does while in the pose (head shakes, blinks, slight breathing). Look at the stuff on Sher Kahn, Milt could drawing anything and move stuff like no one else, yet, that's the most subtle stuff he ever did! What used to impress me was stuff that moved brilliantly (good weight and such), but now what blows me away is subtle acting that makes you feel something. It's kind of scary really-
Okay, just had to get that off of my chest! I am hoping that the next post can be a continuation of the "tutorial series!". I just finished 2 jobs and actually have time to work on my own stuff. yeah!! take it easy all!
Monday, July 24, 2006
Post 2 and a half: Breaking it down
Sorry for the delay on this post everyone! Blogger wouldn't let me upload pictures for the longest time, but now it's all figured out!
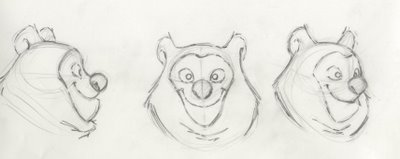 Now that you've all had a chance to look at the rough piece of animation, i'll go through how exactly i came to that point in the process. I mentioned that a turn-around is ideal to put behind you on your disc to flip from for refrence of model. I did up a quick turn around for anyone who wasn't sure what one was. I also did a quick version of a short hand drawing. This is a very useful device to employ when your roughing something out. It's a very loose version of the final design. It's just to get the expression in and block out the volumes. You can really burn through footage fast when you have a short hand version of your character to draw which brings me to my first point of roughing out a shot: LOOSEN UP!
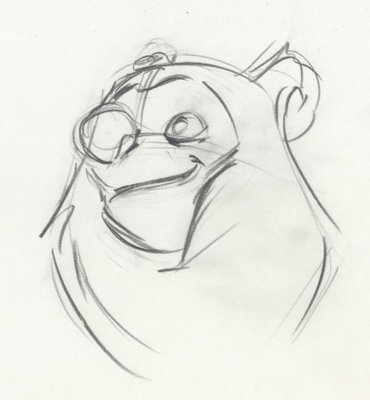
This is NOT the stage for making pretty drawings yet. Personally i think that roughs are quite beautiful when done well and with honesty. Here are things you should not be overly concerned with at this stage of the process: details like hair, nostrils, nuanced facial animation, eye darts, perfecting the dialogue, every single wrinkle in the clothing and every single inbetween. What you SHOULD be focusing on is: performance, gestural drawing, rhythm, consistant purportions, flow, and, you guessed it, performance!!! oh yeah, did i mention performance? It's important to think about your animation in a certain way. I believe this can some up what we do, animate feelings! Meaning, don't think "ok i gotta pick up the leg, move it here"--- naw naw naw, C'mon! animate feelings man! Yes, mechanics: spacing, arcs, on-model drawing contribute to good performance but they are merely a support FOR the performance. I personally feel this way, without great mechanics you can't communicate your great performance properly and yet if your animation is wonky because you don't understand good technique i think it could potentially pull someone out of the performance. Likewise a beautifully animated character from a technical stand-point only tickles the brain, not touch the heart. So while you need to be mindful to a degree at this stage of the process of techincal things, your main goal is making that funny little character breath and live. This is why most people work pretty rough at this stage-- I will admit that these ruffs of mine are a bit more complete than i usually do, but this time around it felt right. I work loosely because your first pass is like trying to capture the essence of the emotion of the scene. The essence of something is the core, all things shed off-- kinda like a quick sketch.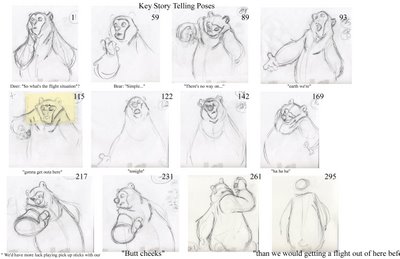 So, step one: Find your story-telling poses. This is always your first step. Finding those poses that will tell the audience what your character is thinking and feeling. You should have done this to a degree already in your thumbnailing process, but everyone works differently and there's no telling how you'll come to that final pose. Sometimes i thumbnail everything out, and then spontinaeously i find something better as i'm roughing it out and then don't even use my thumbnails. Or sometimes I just stick exactly to what i thumbnailed. it's always different. So, i guess the point in all that is to allow for spontinaeous moments but also it's wise to have a pretty clear idea of what your shot is to be eventually. Make sense? How you get there can and will change from shot to shot.
So basically you have your rough poses... and as you can see in the pics they are pretty far apart time wise:frm 1 to frm 59. I call these anchor drawings... they are starting and stopping points, but a lot needs to happen inbetween them. For example, from 1 to 59 the character is just listening to another character say "So what's the flight situation". I have a lot planned for this but i will not execute it untill tie down. Things like breathing, looking around and such. The main thing is to not draw too much attention to himself just yet-- whenever another character is talking and in the same frame (as there will be eventually hence the nudge pose at the end of the shot) you keep the other character "alive" but subdued. I really like using eye darts and breathing for thinking (which you won't see until tie-down). That's all this character is doing at this point, he's thinking about their situation. Thus he hits a brewing point and at frm. 59 lets out the word "simple".
Something else i look for is when an actor takes breath's in their performance, i know i mentioned it for thinking moments but i just plain like it in performances too. It helps give you the sense that the character is alive. It's easy to over-do so you gotta be careful with how much you use it but i like to try and build them into the performances on a consistant basis.
So you hit up all your main story telling keys, roughly time them and then move on to filling it all out a bit.
 Now that you've all had a chance to look at the rough piece of animation, i'll go through how exactly i came to that point in the process. I mentioned that a turn-around is ideal to put behind you on your disc to flip from for refrence of model. I did up a quick turn around for anyone who wasn't sure what one was. I also did a quick version of a short hand drawing. This is a very useful device to employ when your roughing something out. It's a very loose version of the final design. It's just to get the expression in and block out the volumes. You can really burn through footage fast when you have a short hand version of your character to draw which brings me to my first point of roughing out a shot: LOOSEN UP!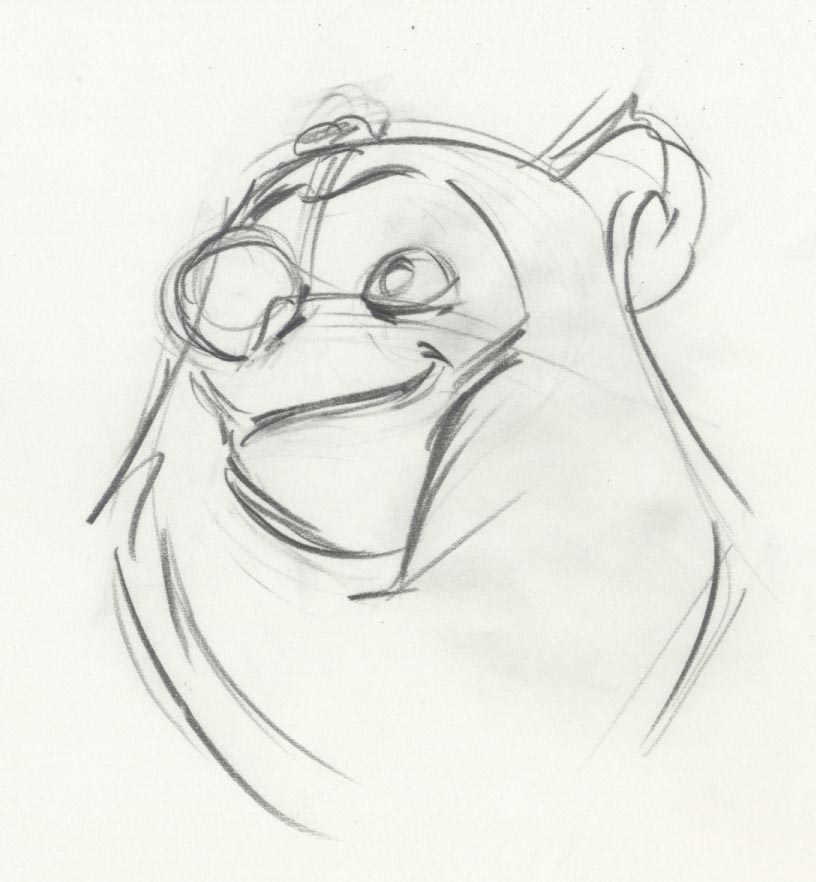
This is NOT the stage for making pretty drawings yet. Personally i think that roughs are quite beautiful when done well and with honesty. Here are things you should not be overly concerned with at this stage of the process: details like hair, nostrils, nuanced facial animation, eye darts, perfecting the dialogue, every single wrinkle in the clothing and every single inbetween. What you SHOULD be focusing on is: performance, gestural drawing, rhythm, consistant purportions, flow, and, you guessed it, performance!!! oh yeah, did i mention performance? It's important to think about your animation in a certain way. I believe this can some up what we do, animate feelings! Meaning, don't think "ok i gotta pick up the leg, move it here"--- naw naw naw, C'mon! animate feelings man! Yes, mechanics: spacing, arcs, on-model drawing contribute to good performance but they are merely a support FOR the performance. I personally feel this way, without great mechanics you can't communicate your great performance properly and yet if your animation is wonky because you don't understand good technique i think it could potentially pull someone out of the performance. Likewise a beautifully animated character from a technical stand-point only tickles the brain, not touch the heart. So while you need to be mindful to a degree at this stage of the process of techincal things, your main goal is making that funny little character breath and live. This is why most people work pretty rough at this stage-- I will admit that these ruffs of mine are a bit more complete than i usually do, but this time around it felt right. I work loosely because your first pass is like trying to capture the essence of the emotion of the scene. The essence of something is the core, all things shed off-- kinda like a quick sketch.
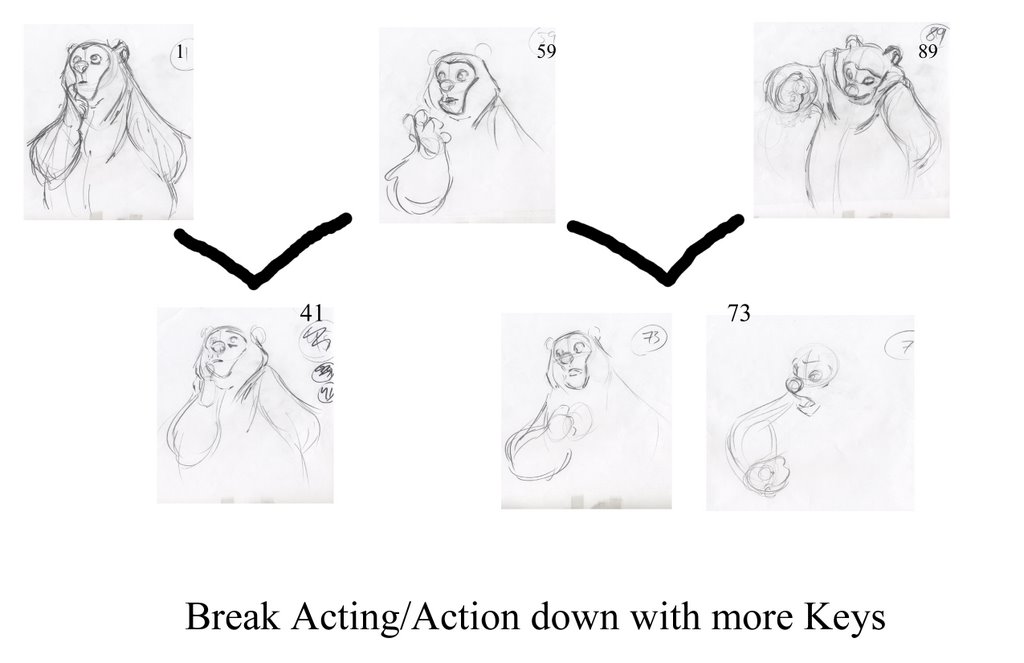
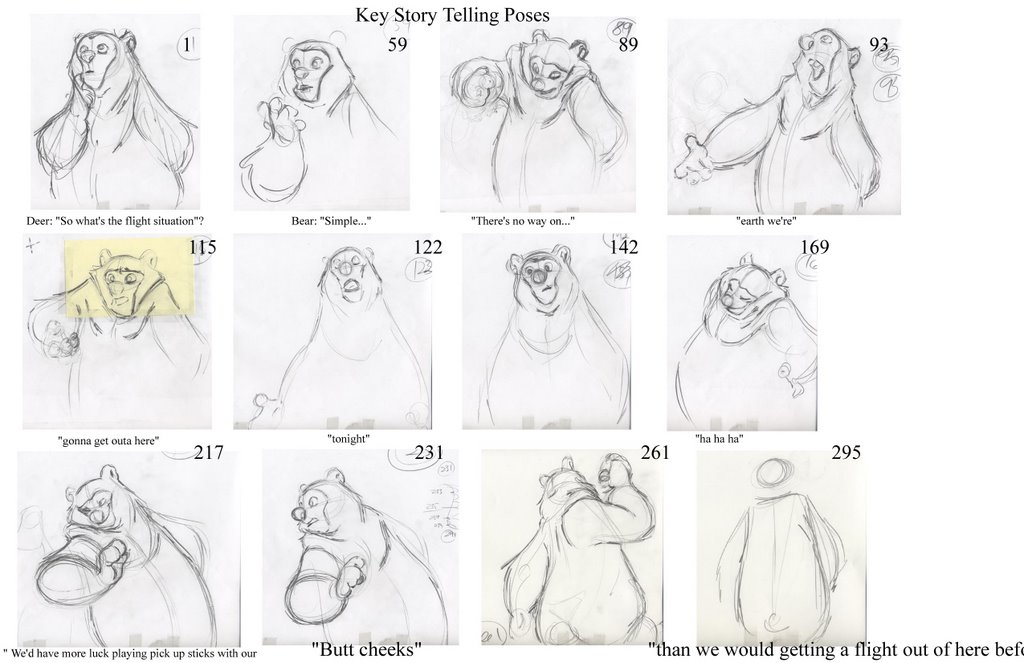 So, step one: Find your story-telling poses. This is always your first step. Finding those poses that will tell the audience what your character is thinking and feeling. You should have done this to a degree already in your thumbnailing process, but everyone works differently and there's no telling how you'll come to that final pose. Sometimes i thumbnail everything out, and then spontinaeously i find something better as i'm roughing it out and then don't even use my thumbnails. Or sometimes I just stick exactly to what i thumbnailed. it's always different. So, i guess the point in all that is to allow for spontinaeous moments but also it's wise to have a pretty clear idea of what your shot is to be eventually. Make sense? How you get there can and will change from shot to shot.
So basically you have your rough poses... and as you can see in the pics they are pretty far apart time wise:frm 1 to frm 59. I call these anchor drawings... they are starting and stopping points, but a lot needs to happen inbetween them. For example, from 1 to 59 the character is just listening to another character say "So what's the flight situation". I have a lot planned for this but i will not execute it untill tie down. Things like breathing, looking around and such. The main thing is to not draw too much attention to himself just yet-- whenever another character is talking and in the same frame (as there will be eventually hence the nudge pose at the end of the shot) you keep the other character "alive" but subdued. I really like using eye darts and breathing for thinking (which you won't see until tie-down). That's all this character is doing at this point, he's thinking about their situation. Thus he hits a brewing point and at frm. 59 lets out the word "simple".
Something else i look for is when an actor takes breath's in their performance, i know i mentioned it for thinking moments but i just plain like it in performances too. It helps give you the sense that the character is alive. It's easy to over-do so you gotta be careful with how much you use it but i like to try and build them into the performances on a consistant basis.
So you hit up all your main story telling keys, roughly time them and then move on to filling it all out a bit.
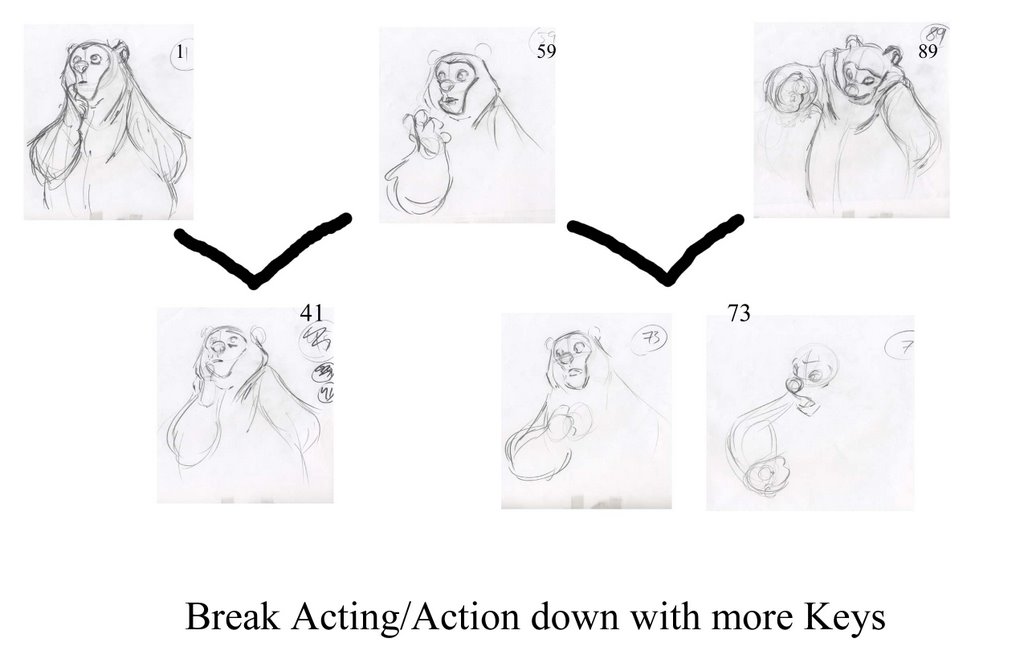
The next step is to break down your anchor keys with some other keys. This is where you build in arcs, breathing, extra thinking poses, head turns. Basically flesh it out-- you really need to be planning ahead for what your eventually going to tie down. Ultimately it's the performance your after but if something is so indecernable (a.k.a so stinking rough and off-model) that you are having an impossible time tying it down maybe you ought to complete your ruffs a little more before you go to tie down. everyones different of course, but i know I've learned a lot from this phrase "Value your ruffs". It's a Glen Keane term not surprisingly-- Some animators treat their ruffs as a means to an end... no no no no, ruffs are an art unto themselves! why do you thinkeveryone loves a good Glen Keane ruff... it's his heart and soul that's why! I digress!
So basically all your doing from here on out the end of the first pass is fleshing things out a bit. You dont want to waiste your time on details that don't matter yet, but you do want to give enough information to tell your director what the shot will eventually look like.
Incidentally, the sooner you can get some numbers going on your animation (i.e timing) the better!
Okee doke peoples! That's it for now-- i do plan on taking a little break from this online teaching stuff for a little bit since it's gonna take me a long time to tie this stuff down on top of work and stuff. So, i might post here and there about some other stuff but rest assured i will finish this series. Looking forward to completing it! take it easy!
Wednesday, July 19, 2006
Post 2: ROUGH IT OUT
hand drawn animation - video powered by Metacafe
Before i forget i DID NOT DEISGN THIS CHARACTER. This is Steven MaCleods of www.clockroom.blogspot.com. This character is from HIS film from CalArts this year. It's one of those designs that just roll off your pencil, really wonderful shapes! i love him Steve!
Here it finally is! In the next couple days i will go through it piece by piece and breakdown exactly how i approached this rough stage. Remember everyone, this is just a rough. There's a LOT tweeking that has to happen from here (mainly pulling things back a bit), this is just your heart and soul on the paper. the next step is refining it all in tie down. but look for my next post where i will break it all down for everyone. enjoy!
Monday, July 17, 2006
Step 1 and a half: Before you rough out your shot (Tips and Tricks)
Welp, here we are again on the second post of the "animate your own shot" saga! This post will mainly be a sorta of common sense kind of lesson. There are some helpful Tips and Tricks that i employ while getting ready to animate a shot. and by the way, these are in no particular order. OK! you've got your road map, you've got your conviction and your gusto, and a lot of coffee! your almost ready to start your amazing shot that young and old will admire for centuries to come! The very first thing i do AFTER conception of a shot (this sounds like Health Ed), is write up your X-Sheet. Richard Williams does a fine job of explaining this in his book, but using your X-Sheet is a great way to think through your timing. Sometimes you want to do funny little hand gestures ontop of your main pose and aren't sure if the hand will settle in enough time for your main pose to read, this is where you start to gestimate whether it'll work or not. It's hit and miss. The more you animate the more your know what'll work and what won't. And also, number your X-sheet all the way to the end on the odd numbers: 1, 3, 5, 7, 9, etc... I've had animators tell me that at ALL cost keep things on odd numbers. This never made complete sense to me, what they meant is "if you keep it on odd's then you can keep it all on 2's and make less work for yourself". As long as that works for your scene fine, but if something needs to be keyed out on 3's just do the work! If you don't want to work hard why are you in animation for heavens sake? but also more practically if you plan things on 2's and they stay on 2's it's easy to throw things on 1's without having to renumber like made. Plus, it's easier to find where your at in the shot if you have a problem arising. Your drawing number IS the frame number on this system and makes things easier on everyone.
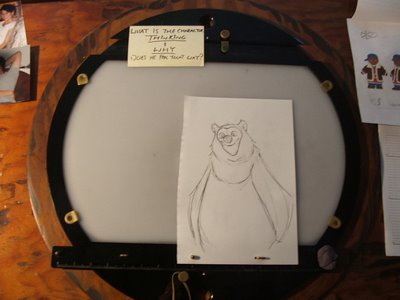
Another tip for ya is to blow up or down a xerox of the model sheet to match the size of the character your animating and tape it to the top of your disc (as shown in pic above) so all you have to do is flip to the back to check on how your drawing the model (a turn around is ideal). Trust me, no matter how big or how small your shot is DO THIS! There is a great story i heard from animator Derek Thompson. He worked at DreamWorks on Prince of Eygpt... one day he walked into James Baxters office and started small talking and asked him how he got his work "so solid". James didn't say a word, stood up, walked down the hall to the xerox machine, tapped on it as if to say "like this" and walked back into his office. All with a smile on his face. He meant that he uses the xerox machine in ways like this to maintain the model. If James finds it useful, i think WE ALL need to be doing this.
Also, and this is a matter of opinion, do turn off your music, radio, dvd, whatever it is. I LOVE to "watch" or listen to movies while i work. I do it all the time, but NOT while i am doing my first pass. Your first pass is really your heart and your soul and if your like most you need concentration to find the scene somewhere inside you. It may not be the prettiest version of your scene, but it sometimes is the most honest. Personally when i know the shot is working acting wise, i put on a film that helps me zone out but not until i have it.
I know this post must seem slightly boring and thin compared to the last, but this is just a simple tips and tricks post. The NEXT post (in 2 days!) you get to actually see what the roughed out shot looks like and i'll talk about how i approached it. Until then be thinking about questions you might have and i'd be happy to answer them!

Another tip for ya is to blow up or down a xerox of the model sheet to match the size of the character your animating and tape it to the top of your disc (as shown in pic above) so all you have to do is flip to the back to check on how your drawing the model (a turn around is ideal). Trust me, no matter how big or how small your shot is DO THIS! There is a great story i heard from animator Derek Thompson. He worked at DreamWorks on Prince of Eygpt... one day he walked into James Baxters office and started small talking and asked him how he got his work "so solid". James didn't say a word, stood up, walked down the hall to the xerox machine, tapped on it as if to say "like this" and walked back into his office. All with a smile on his face. He meant that he uses the xerox machine in ways like this to maintain the model. If James finds it useful, i think WE ALL need to be doing this.
Also, and this is a matter of opinion, do turn off your music, radio, dvd, whatever it is. I LOVE to "watch" or listen to movies while i work. I do it all the time, but NOT while i am doing my first pass. Your first pass is really your heart and your soul and if your like most you need concentration to find the scene somewhere inside you. It may not be the prettiest version of your scene, but it sometimes is the most honest. Personally when i know the shot is working acting wise, i put on a film that helps me zone out but not until i have it.
I know this post must seem slightly boring and thin compared to the last, but this is just a simple tips and tricks post. The NEXT post (in 2 days!) you get to actually see what the roughed out shot looks like and i'll talk about how i approached it. Until then be thinking about questions you might have and i'd be happy to answer them!
Wednesday, July 12, 2006
Teaching at CalArts
Phewwwwww- these 2 free-lance gigs are killing me man! Am thankful for the work but sheesh, i need a little me time know what i'm sayin'? This post is mainly for my CalArts students... I just wanted to let you all know how much fun i had last semester, it truly was MY pleasure to get nerdy about animation with you guys. But alas, teaching first year was not to be for me this coming semester. Mike Ngyuen will be returning to teach 1st year so Cynthia asked me if i'd be willing to step aside............... AND TEACH 2ND YEAR BABY! Oh yeah, we get to nerd out for a whole other year! And boy do i have some RAD RAD assignments for you guys! You guys are gonna get your brains so swelled with animation goodness that all you'll be able to do is respond to people in animation terms. "so how long will you be gone for? Ohhhhh, about 3000 frames" or, "Could you reach that for me? Sure, let me time it out on my X sheet first. Let's see, anticipate, squash down, stretch up, delay arms...
But seriously folks, it's gonna be RAD! Be looking for the next post on the "How to do a flippin' cool shot" serious. I am gonna cover a little more practical tips and tricks in what you do right before you start animating next. stay tuned!
But seriously folks, it's gonna be RAD! Be looking for the next post on the "How to do a flippin' cool shot" serious. I am gonna cover a little more practical tips and tricks in what you do right before you start animating next. stay tuned!
Thursday, July 06, 2006
Step 1: Planning your Shot
Soooo, the long awaited "Start to finish" series of posts has officially begun! I am sorry for the time it has taken, but i have been gone, am working 2 freelance gigs (and am thankful for the work), and plainly i wanted to make sure this was as good a post as it could be. So i've put a lot of thought into it!
Let me start this post out with the comment that this is only ONE way of animating. there are as many ways of animating a shot as there are animators! So, find what works best for you and then modify it. The wonderful thing about art and animation is that it is so very personal-- make it your own! I can't say that i use even my own methods all the time. Sometimes certain scenes are very simple shots that don't need elaborate planning. I am doing a 30 frame shot for a commercial right now-- very very simple, i didn't even thumbnail it. However, i find when a shot is "lengthyer" and more specifically offers certain acting/staging challenges I NEED to explore on paper. but before any thumbnailing happens i am going to tell you to do something that a Production Manager would HATE me for, but here it is: THINK! The last thing you should do when starting a new shot is pick up your pencil. You HAVE to internalize what you are about to execute. If you can't do either one of these things you're scene will not be successful.
A: Visualize
B: Internailze
Ollie Johnston has been qouted as saying "If you can't see it, you won't be able to draw it. I believe that seeing it and feeling it (internalizing it) are related but not necessarily the same. I think they are related in that if you can't feel it, then you won't be able to invision it clearly in your head. So, think about your scene. Ask questions: who is he what's his personality, where does this shot take place in the arc of the story, who did he just talk to and what was the last emotion he/she felt, what's the arc of the scene, where's the entertainment value in this shot. BE RUTHLESS with yourselves in your exploration... if you find yourselves slavishly applying Preston Blair formulas to your shots then your scene is already dead. Yes, sometimes books like that help with technical things but right now i'm talking about conception of a shot! Get OUT of your studio, take a walk, ride your bike, read, whatever inspires you!
I personally like to take walks and really think through my shots... by the time i'm done with my walk i am ready to start writting down some ideas. Also, this is a great time for research. Now this i will say with no apollogy... everyone needs to research. I don't care who you are but so much comes from studying and researching that you couldn't possibly have brought to it any other way.
So to sum it all up-- get juiced up and excited about what your gonna do. I know that i cannot animate something unless i believe in it wholeheartedly! Have the guts to challenge and idea you think is weak (with grace of course) and be willing to be wrong. that's the big one, throw your pride out the window man! I learned that one the hard way!
So... now that you've though all about your shot and have conviction and just KNOW that your scene is going to be revered through the anals of time you can begin to plan and thumbnail! Ideally before you start thumnailing or even thinking about your shot you should have your dialogue memorized. All of the ups and downs... where the accents are. KNow it in and out. What i start doing at this point is finding some gestures that tell the main key points of the scene. It doesn't have to be many poses, in fact it's usually better when you simplify. Tony DeRosa's main comment on most of my animation has been to simplify it-- so start scribbling and finding those gestures that explain what the character is feeling and thinking.
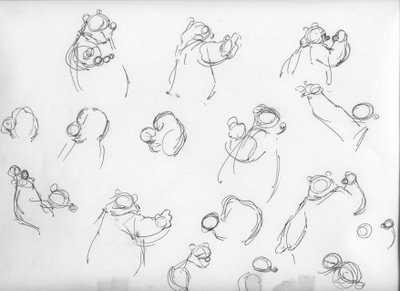
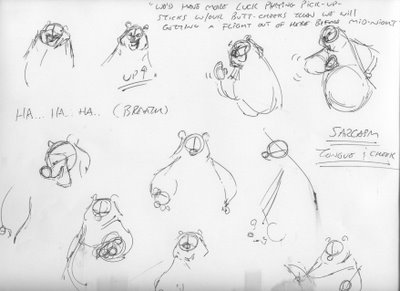
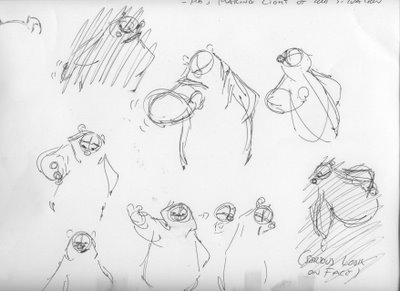
Here are some pages of thumbnails i did for the shot i will be animating. It is here where you find your gesture, plan your staging, write down ideas... let it all out. Try things that are outrageous-- you never know where your thoughts might carry you. Oh, and don't worry about making pretty drawings-- these are just thoughts, i use stick figures a lot when i am thumbnailing. Especially when i don't know the character too well yet.
The line of Dialogue reads: Deer:"So whats the flight situation?" Bear: "Simple (pause)... there's no way on earth we're getting out of here tonight(pause and laughs). we'd have more luck playing pick up sticks with our butt cheeks that we would getting a flight out of here before midnight" ( i tried posting the dialogue put could not)
Let me start this post out with the comment that this is only ONE way of animating. there are as many ways of animating a shot as there are animators! So, find what works best for you and then modify it. The wonderful thing about art and animation is that it is so very personal-- make it your own! I can't say that i use even my own methods all the time. Sometimes certain scenes are very simple shots that don't need elaborate planning. I am doing a 30 frame shot for a commercial right now-- very very simple, i didn't even thumbnail it. However, i find when a shot is "lengthyer" and more specifically offers certain acting/staging challenges I NEED to explore on paper. but before any thumbnailing happens i am going to tell you to do something that a Production Manager would HATE me for, but here it is: THINK! The last thing you should do when starting a new shot is pick up your pencil. You HAVE to internalize what you are about to execute. If you can't do either one of these things you're scene will not be successful.
A: Visualize
B: Internailze
Ollie Johnston has been qouted as saying "If you can't see it, you won't be able to draw it. I believe that seeing it and feeling it (internalizing it) are related but not necessarily the same. I think they are related in that if you can't feel it, then you won't be able to invision it clearly in your head. So, think about your scene. Ask questions: who is he what's his personality, where does this shot take place in the arc of the story, who did he just talk to and what was the last emotion he/she felt, what's the arc of the scene, where's the entertainment value in this shot. BE RUTHLESS with yourselves in your exploration... if you find yourselves slavishly applying Preston Blair formulas to your shots then your scene is already dead. Yes, sometimes books like that help with technical things but right now i'm talking about conception of a shot! Get OUT of your studio, take a walk, ride your bike, read, whatever inspires you!
I personally like to take walks and really think through my shots... by the time i'm done with my walk i am ready to start writting down some ideas. Also, this is a great time for research. Now this i will say with no apollogy... everyone needs to research. I don't care who you are but so much comes from studying and researching that you couldn't possibly have brought to it any other way.
So to sum it all up-- get juiced up and excited about what your gonna do. I know that i cannot animate something unless i believe in it wholeheartedly! Have the guts to challenge and idea you think is weak (with grace of course) and be willing to be wrong. that's the big one, throw your pride out the window man! I learned that one the hard way!
So... now that you've though all about your shot and have conviction and just KNOW that your scene is going to be revered through the anals of time you can begin to plan and thumbnail! Ideally before you start thumnailing or even thinking about your shot you should have your dialogue memorized. All of the ups and downs... where the accents are. KNow it in and out. What i start doing at this point is finding some gestures that tell the main key points of the scene. It doesn't have to be many poses, in fact it's usually better when you simplify. Tony DeRosa's main comment on most of my animation has been to simplify it-- so start scribbling and finding those gestures that explain what the character is feeling and thinking.
Here are some pages of thumbnails i did for the shot i will be animating. It is here where you find your gesture, plan your staging, write down ideas... let it all out. Try things that are outrageous-- you never know where your thoughts might carry you. Oh, and don't worry about making pretty drawings-- these are just thoughts, i use stick figures a lot when i am thumbnailing. Especially when i don't know the character too well yet.
The line of Dialogue reads: Deer:"So whats the flight situation?" Bear: "Simple (pause)... there's no way on earth we're getting out of here tonight(pause and laughs). we'd have more luck playing pick up sticks with our butt cheeks that we would getting a flight out of here before midnight" ( i tried posting the dialogue put could not)
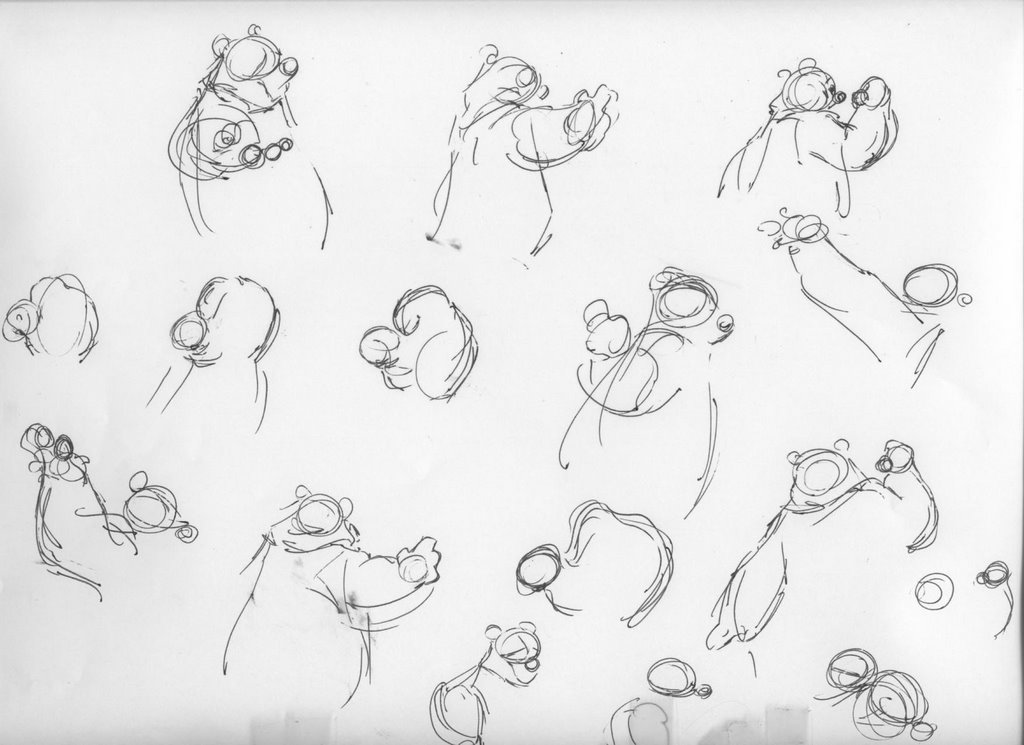
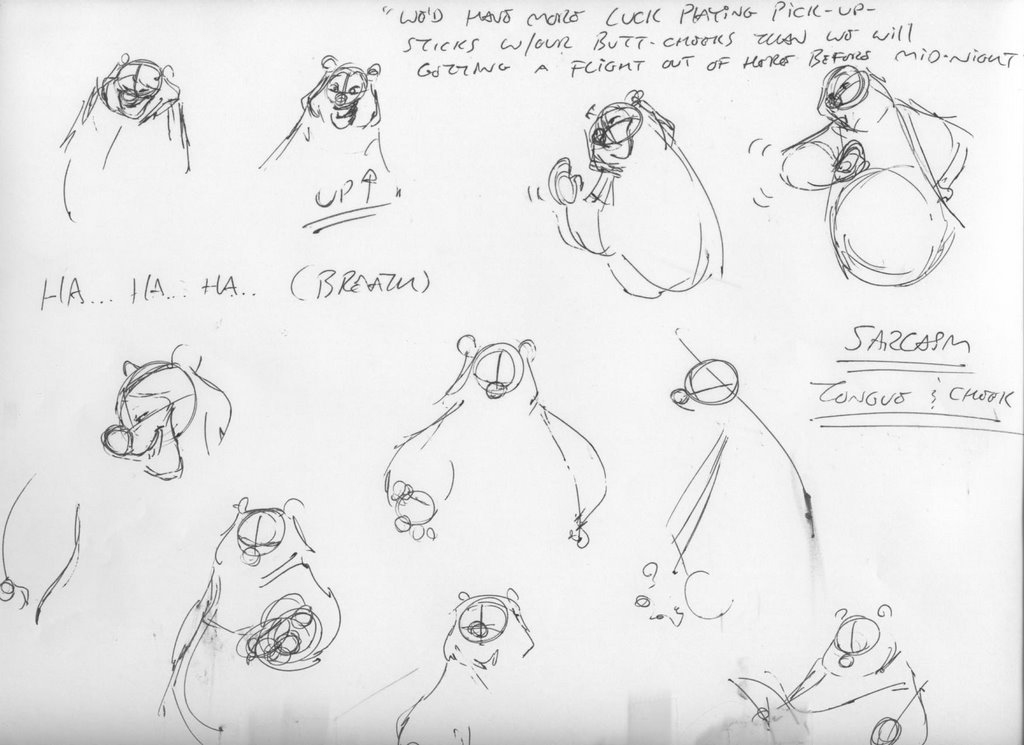
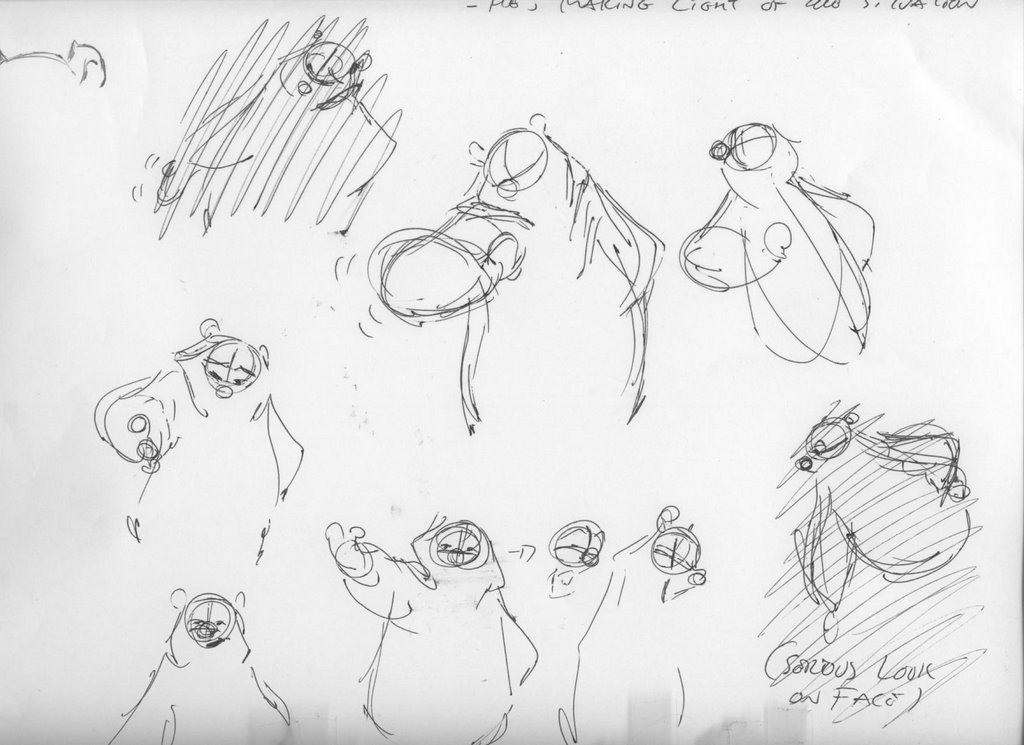
I mean come on, look at these drawings! they suck! They're not meant to be pretty, they are meant to be honest. I think sometimes it can be a downfall of animators to mistakes nice poses for "thinking". I've done it for sure-- certainly poses can evoke thinking, but i really feel like think is shown mainly in change. i.e A character is in a situation where he is being asked to make a difficult decision. He is tense, shoulders up, chest inflated, brows down-- he realized he needs to make a certain decision and is at ease with it. He relaxes his shoulders and exhales and lifts his brows. There is not a huge pose change in there, just a change of shape that shows us his thinking. You are working within a pose with something like this-- now sometimes you want to have some sort of change of line of action to make your idea clear it's just knowing where to do it. I am only skipping around these topics because i will cover more once we get into the animating portion of the posts (the FUN part).
I hope that's a fine start for everyone! Please please feel free to ask question if you have them either e-mail me or just post it and i'll reply. So get excited, get inspired and have fun everyone!
Sunday, June 11, 2006
forgive me, please!
* NOTE TO VIEWERS: THIS ANIMATION IS NOT PLAYING AT THE CORRECT FRAME RATE. CHECK BACK SOON TO SEE IF YOU I GOT IT FIXED!*
Everyone who has a blog needs to look at their sitemeter and track who's been to your blog. I just recently started doing this and it is SO fascinating who's been here! it doesn't give names but it does give countries, cities and sometimes even company names. Last week people from Disney, Dreamworks, ILM, Pixar, Germany, Peru, Nepal, and even Iran were on this site! pretty crazy, i forget that this is accessable to the entire world. literally! Go check out who's been looking at your work!
Sooooo,you all are going to kill me, or stop visiting my blog but i am affraid this post will not be about roughing out your scenes. I have been thinking long and hard about it and have come to a dicision about how to show everyone what i am talking about. I am just gonna animate something for everyone. I am gonna walk everyone through the steps of how i particularly animate a shot from thumbnails to finished inbetweened tie downs. the reasons for this are multiple. I got a little work, praise God! but more over i will be gone for about 2 and a half weeks starting tuesday and unable to post on the blog.
What i thought i'd do is show everyone this finished bit of animation i did for my reel. I posted the half finished version but never showed the entire thing. this is now considered an old test by me, and the characters model has changed. I didn't have him quite nailed down at this piont. There are bigger oops's but i don't need to piont them all out do i? I hope you all enjoy this. I'll be sure to post one last time before i leave on Tuesday. Until then, have a great two weeks!
Tuesday, June 06, 2006
Geeking out to the max!
Here's a little drawing Glen did in my "Art of Tarzan" book for me on the day i visited the studio. The note says " To Matt, Keep persuing your goal. God Bless you as you do"

I haven't done a lot of geeking out on this blog, i figured while i try to think through what it is i want to say about ruffing out a scene i'd put up some cool drawings from some of my influences.
This first one is from Glen Keane. Glen was my foremost influence in my youth- i've known who that guy was since i was 8! His passion for this artform always was contageous, even from 2000 miles away. anyhow, i had never met him until i was 18. I was in my frist year at CalArts, and anyone who knew me knew i was a Keane nut. in fact, Max, Glen's son was in my class and was even in my cubical. I didn't get to know him too well, he left after 2 months. anyhow, i got the opportunaty to meet Glen in my 1st semester of being at CalArts. I packed all my portfolio stuff up perfectly, had it all arranged: quick sketches, life drawings and then everything else.
I got the Disney and waited down in the lobby for Glen's secretary to some and meet me. It was the first moment that i thought maybe this guys not what i think he is. I mean, i've met a lot of the guys considered to be "the greats" of our day and unfortunately not all of them are admireable people. I started to get nervous that maybe my childhood hero was not Santa but Satan! well, maybe not Satan. I picked up my stuff and went with Penelope (Glen's secretary) up the his office. She was super sweet, offered my some coffee and told me i have to wait for a while until Glen was ready. We rounded the corner and Glen was waiting for us-- I was relieved, he was actually santa claus! My memory kinda blanked out for a bit, i remember being really thirsty and sweaty all of the sudden. beyond that i recall him being extremely gracious and giving of his time. before he even opened up my portfolio he asked me a bunch of questions about me, where i'm from, what kind of artwork do i like. He made me feel like he was actually interested in me and my growth as an artist and a person. He proceeded to open my portfolio and slowly go through it page by page. I've never wanted a pair of diapers more than at that moment. It was gut renching- but he was gracious... VERRRRY gracious. He encouraged me, told me what he liked, didn't like and then proceeded to show me what he had been doing. He pulled out a sketchbook and started flipping through it page by page telling me stories about these people he'd see at the park or whatever. It was thuroughly inspiring to a young lad- He then shut his door and went to his computer and pulled up the sequence from Treasure Planet he was working on. It was the first time we see Silver in the kitchen. I was blown away-- i remember trying so hard to memorize everything because i knew i wouldn't have this happen again.
Then all of the sudden Johnny Resnick from the Goo Goo Dolls walked in with the producer of the film and i was swiftly ushered out by Glen's secretary(and understandably so). While Glen was talking with them I got a tour of the other animators office. Even though it was all a thrill for a young guy, my mind was still on all of those beautiful drawings in Glen sketchbook and walls. Well, the tour was over and i started to make my way out of the building and I heard "Matt, hey Matt!" It was Glen at the foot of an animators office signaling me to come in. I was sure he was talking to another Matt in the room, but i thought i'd better get in there before that other Matt did! I went into the office and proceeded to watch Glen critique an animators work, Bert Kliens in this case. Little did i know that Bert would hire me just a year later for Looney Tunes: Back in Action.
All in all it was a memorable day- even just thinking about it is inspiring enough for me right now. The next post will definately be the long awaited "1st pass" tutorial. until then take it easy!
Matt

I haven't done a lot of geeking out on this blog, i figured while i try to think through what it is i want to say about ruffing out a scene i'd put up some cool drawings from some of my influences.
This first one is from Glen Keane. Glen was my foremost influence in my youth- i've known who that guy was since i was 8! His passion for this artform always was contageous, even from 2000 miles away. anyhow, i had never met him until i was 18. I was in my frist year at CalArts, and anyone who knew me knew i was a Keane nut. in fact, Max, Glen's son was in my class and was even in my cubical. I didn't get to know him too well, he left after 2 months. anyhow, i got the opportunaty to meet Glen in my 1st semester of being at CalArts. I packed all my portfolio stuff up perfectly, had it all arranged: quick sketches, life drawings and then everything else.
I got the Disney and waited down in the lobby for Glen's secretary to some and meet me. It was the first moment that i thought maybe this guys not what i think he is. I mean, i've met a lot of the guys considered to be "the greats" of our day and unfortunately not all of them are admireable people. I started to get nervous that maybe my childhood hero was not Santa but Satan! well, maybe not Satan. I picked up my stuff and went with Penelope (Glen's secretary) up the his office. She was super sweet, offered my some coffee and told me i have to wait for a while until Glen was ready. We rounded the corner and Glen was waiting for us-- I was relieved, he was actually santa claus! My memory kinda blanked out for a bit, i remember being really thirsty and sweaty all of the sudden. beyond that i recall him being extremely gracious and giving of his time. before he even opened up my portfolio he asked me a bunch of questions about me, where i'm from, what kind of artwork do i like. He made me feel like he was actually interested in me and my growth as an artist and a person. He proceeded to open my portfolio and slowly go through it page by page. I've never wanted a pair of diapers more than at that moment. It was gut renching- but he was gracious... VERRRRY gracious. He encouraged me, told me what he liked, didn't like and then proceeded to show me what he had been doing. He pulled out a sketchbook and started flipping through it page by page telling me stories about these people he'd see at the park or whatever. It was thuroughly inspiring to a young lad- He then shut his door and went to his computer and pulled up the sequence from Treasure Planet he was working on. It was the first time we see Silver in the kitchen. I was blown away-- i remember trying so hard to memorize everything because i knew i wouldn't have this happen again.
Then all of the sudden Johnny Resnick from the Goo Goo Dolls walked in with the producer of the film and i was swiftly ushered out by Glen's secretary(and understandably so). While Glen was talking with them I got a tour of the other animators office. Even though it was all a thrill for a young guy, my mind was still on all of those beautiful drawings in Glen sketchbook and walls. Well, the tour was over and i started to make my way out of the building and I heard "Matt, hey Matt!" It was Glen at the foot of an animators office signaling me to come in. I was sure he was talking to another Matt in the room, but i thought i'd better get in there before that other Matt did! I went into the office and proceeded to watch Glen critique an animators work, Bert Kliens in this case. Little did i know that Bert would hire me just a year later for Looney Tunes: Back in Action.
All in all it was a memorable day- even just thinking about it is inspiring enough for me right now. The next post will definately be the long awaited "1st pass" tutorial. until then take it easy!
Matt
Wednesday, May 24, 2006
ummmmm, here look at this.
hand drawn animation on Vimeo
Not my most brilliant shinning moment but fun none the less! I am a big Wallace Tripp fan, thus a BIG Chris Sanders fan. I really liked Lilo and Stitch and have always felt like it is slightly over looked although i did feel it was appreciated. If there was any film besides Beauty and the Beast or Lion King that i would have liked to have worked on i think it would have been Lilo.
I animated this at Toonacious Family Entertainment (Tony Bancroft's studio). I was glad that they kept everything here in the states since the budget was so LOW. The triumph of the shot was certainly not my animation but the great job Trevor Tamboline did on the clean-up. I typically work tight enough that all you need to do is trace my stuff but the time frame of this job was super short that i didn't have time to tie down a whole lot. Trev did a great job, and i thought the EFX made the shot stand out a bit too.
The other fun bit about this job was working with Alex Kuperschmidt. Toonacious got him to do a few scenes and hit up some drawings for model. I didn't get to communicate too much with him, but i think he's an amazing talent that is, again, quite over-looked! Everyone ought to go to Lilo and Stitch and really study his timing. Very interesting to see how he bends the rules.
OKee doke folks! Till next time!
Monday, May 22, 2006
Ian Worrell

I realized i haven't done much plugging for other people this year in the blogging realm. As some of you know i teach animation at CalArts. This year i was blown away by one film in particular-- "Icarus and the Tree Herder". Ian Worrell is the student that created this little gem of filmmaking. check out his blog and all his amazing artwork! http://ianworrel.blogspot.com/
Wednesday, May 17, 2006
model sheets!

A momentus thing has happened in the progression of this short film! MODELSHEETS... it's been a LOOOOONG road to find this guys, but i believe i have after a year and a half of searching. I am not necessarily a designer. i love design, and find it fascinating, but i don't consider myself a natural at it. It has taken a lot of blood and sweat to find these.
The characters are there, the story is coming together, the design is taking form-- this is so much fun! oh yeah, i still have to find a job! well, i hope everyone enjoys these!

Subscribe to:
Posts (Atom)